
NCNN
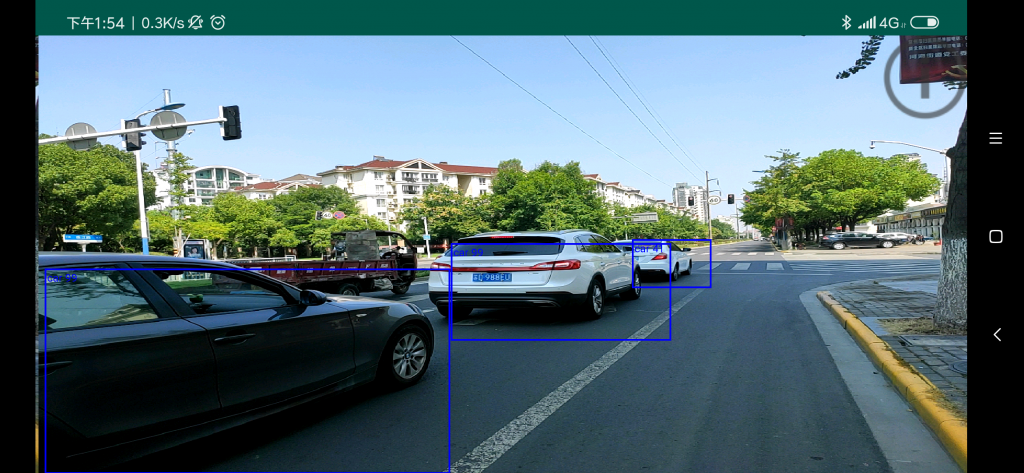
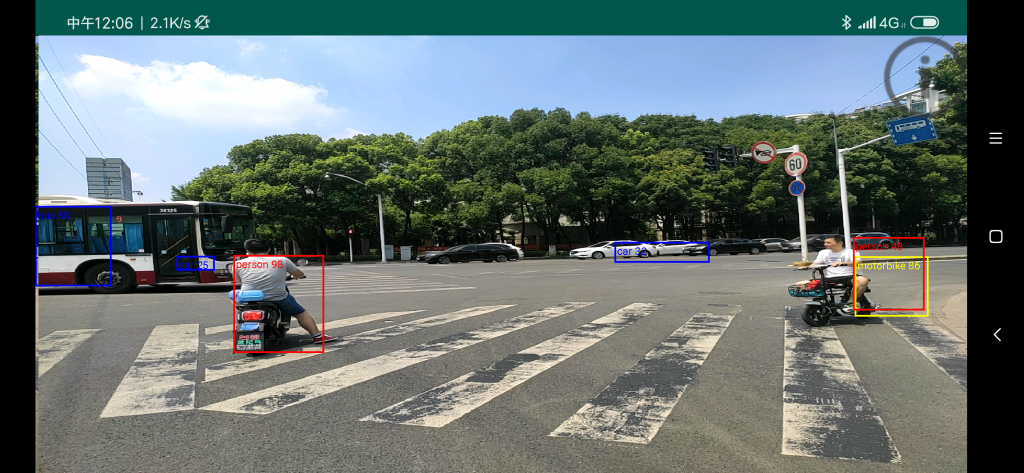
ncnn 是腾讯提供的移动端框架 非常时候在手机玩

在研究了一段时间的 ncnn后 准备做一个安卓的demo 以便更好的熟悉和使用 NCNN

先上APP和效果
app地址 :https://pan.baidu.com/s/1MX8GnM3xR4u0dcyw7iVSRg
安卓程序编写过程
程序本身并不复杂 但是搞安卓的过程中发现 摄像头获取下视频真的是累的要去死
程序框架
启动过程
    ----------    -----------------                 -------------
    |Main窗口| -->|Camera Fragment|  获取图像 ----> |Surface显示| <--
    ---------- |  -----------------             |   -------------   |
               |                                |                   |
               |  --------------                |   --------------  |
               -->|JNI 加载模型|                --->|ncnn推理计算|---
                  --------------                    --------------
数据流程
JAVA
    -----------    ------------------      -------------
    |CAMERAYUV| -->|YUV 转RGB Bitmap|  --> |Surface显示|
    -----------  | ------------------      -------------
                 |                                  |
JNI              | --------------    -----------    |
                 ->|YUV Y 转 RGB| -->|Mobilenet| -->|
                   --------------    -----------
编写过程
摄像头权限问题
android 7以后的程序需要获取摄像头的需要主动申请权限 一开始没弄各种不行
后参考使用camera2 官方demo解决
    private void requestCameraPermission() {
        if (shouldShowRequestPermissionRationale(Manifest.permission.CAMERA)) {
            new ConfirmationDialog().show(getChildFragmentManager(), FRAGMENT_DIALOG);
        } else {
            requestPermissions(new String[]{Manifest.permission.CAMERA}, REQUEST_CAMERA_PERMISSION);
        }
    }

    @Override
    public void onRequestPermissionsResult(int requestCode, @NonNull String[] permissions,
                                           @NonNull int[] grantResults) {
        if (requestCode == REQUEST_CAMERA_PERMISSION) {
            if (grantResults.length != 1 || grantResults[0] != PackageManager.PERMISSION_GRANTED) {
                ErrorDialog.newInstance(getString(R.string.request_permission))
                        .show(getChildFragmentManager(), FRAGMENT_DIALOG);
            }
        } else {
            super.onRequestPermissionsResult(requestCode, permissions, grantResults);
        }
    }
引入ncnn库的问题
其实官方说明已经很详细了(~ ~! 并没有找到啊~~)
实际引入需要对cmakefile进行一些调整
首先参照AS的向导建立ndk工程
然后将github上release中的 ncnn库文件 和lib拷贝到 cpp目录下
这里我使用的是 ncnn-android-lib 目录 如图
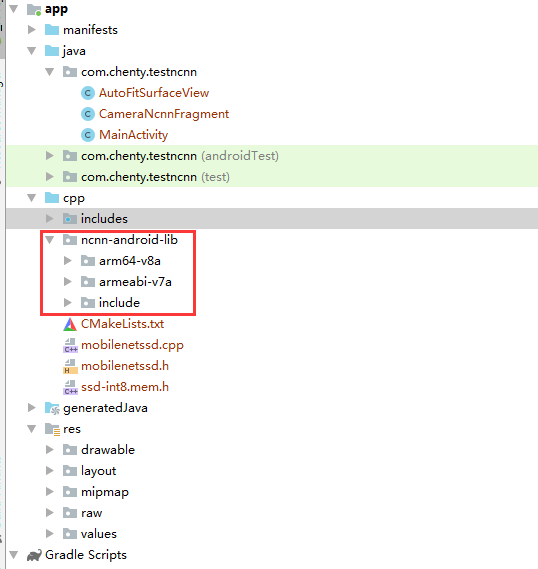
导入后需要对路径进行配置 并链接 openmp 否则会出现错误
修改CMakeLists.txt
# For more information about using CMake with Android Studio, read the
# documentation: https://d.android.com/studio/projects/add-native-code.html

# Sets the minimum version of CMake required to build the native library.

cmake_minimum_required(VERSION 3.4.1)

FIND_PACKAGE( OpenMP REQUIRED)
if(OPENMP_FOUND)
    message("OPENMP FOUND")
    set(CMAKE_C_FLAGS "${CMAKE_C_FLAGS} ${OpenMP_C_FLAGS}")
    set(CMAKE_CXX_FLAGS "${CMAKE_CXX_FLAGS} ${OpenMP_CXX_FLAGS}")
    set(CMAKE_EXE_LINKER_FLAGS "${CMAKE_EXE_LINKER_FLAGS} ${OpenMP_EXE_LINKER_FLAGS}")
endif()

# Creates and names a library, sets it as either STATIC
# or SHARED, and provides the relative paths to its source code.
# You can define multiple libraries, and CMake builds them for you.
# Gradle automatically packages shared libraries with your APK.

include_directories(./ncnn-android-lib/include)

add_library( # Sets the name of the library.
        native-lib


        # Sets the library as a shared library.
        SHARED

        # Provides a relative path to your source file(s).
        mobilenetssd.cpp)

# Searches for a specified prebuilt library and stores the path as a
# variable. Because CMake includes system libraries in the search path by
# default, you only need to specify the name of the public NDK library
# you want to add. CMake verifies that the library exists before
# completing its build.

find_library( # Sets the name of the path variable.
        log-lib

        # Specifies the name of the NDK library that
        # you want CMake to locate.
        log)


# Specifies libraries CMake should link to your target library. You
# can link multiple libraries, such as libraries you define in this
# build script, prebuilt third-party libraries, or system libraries.

target_link_libraries( # Specifies the target library.
        native-lib

        ${CMAKE_SOURCE_DIR}/ncnn-android-lib/${ANDROID_ABI}/libncnn.a

        # Links the target library to the log library
        # included in the NDK.
        ${log-lib})
然后就可以正常使用 NCNN了
jni调用的参数传递
为了提高效率 我并没有对图像数组进行拷贝
而是使用了 临界区映射的方法 GetPrimitiveArrayCritical 这样避免了拷贝但是出现了一个巨坑 各种百度不到
extern "C" JNIEXPORT jdoubleArray JNICALL
Java_com_chenty_testncnn_CameraNcnnFragment_detectyonly(JNIEnv *env, jobject thiz, jbyteArray frame, jint src_width,
                                jint src_height, jdoubleArray detect) {
    char *argb_frame = (char*)env->GetPrimitiveArrayCritical(frame, NULL);

    int size = env->GetArrayLength(frame);
    int objectcnt = 0;
    int i;

    //shift argb to rgba
    char *rgba = (char *)malloc(size);
    memcpy(rgba, argb_frame + 1, size - 1);

    env->ReleasePrimitiveArrayCritical(frame, argb_frame, JNI_ABORT);

    struct ai_object_t *obj = cpp_mobilenet_aidetect((const unsigned char *)rgba, src_width, src_height, &objectcnt);

    free(rgba);

    double *detect_out = (double *)env->GetPrimitiveArrayCritical(detect, NULL);
    if(objectcnt <= 0)
        objectcnt = 1;

    for(i = 0 ; i < objectcnt ; i++)
    {
        detect_out[i*6 + 0] = obj->label;
        detect_out[i*6 + 1] = obj->prob;
        detect_out[i*6 + 2] = obj->x;
        detect_out[i*6 + 3] = obj->y;
        detect_out[i*6 + 4] = obj->xe;
        detect_out[i*6 + 5] = obj->ye;
        obj++;
    }


    env->ReleasePrimitiveArrayCritical(detect, detect_out, JNI_ABORT);

    return detect;
}
问题是 本身函数设计是 输入图像数组 长 宽 输出 判定结果
然后在里面死活new 不了double数组
后来想想应该就是这个临界区不能new对象的原因
最后丧心病狂 直接java new一个数组传进来算了。这就是目前的实现了
YUV数据的获取
安卓默认获取摄像头数据 是直接写入到SURFACE的 效率很高 无法直接获取
目前有2个方法获取这个数据
先绘制到SURFACE,然后从SURFACEDUMP RGB数据(OpenCV的做法)
建立一个拍照Session 手动获取图片
这里使用第二种方法 这个魔改demo的地方实在是太多了 大家自己看吧
基本上就是建立session 获取YUV 其中的坑很多 但是都可以百度解决还行吧。
数据进入计算都完成了
现在已经可以在Log中看到SSD出来的目标了,很好,然后是数据绘制
数据绘制
我们截断了数据的获取过程,当需要显示的时候又很纠结了。
首先发现安卓 后摄像头默认是横着的 WTF。。。 绘制图像需要旋转90度。。。
直接锁定应用只能横屏显示(机智~~)
绘制需要使用Surface 并且缩放,so Ctrl+C Ctrl+V了一堆代码 实现了。。
显示和计算分离
经过上面的过程,已经可以显示出大体的效果了,但是每次计算耗时需要1秒,图像像幻灯片一样 这这么行。
于是做了一个简单的自锁和计算显示分离
            //split process function to prevent img reflash stop
            if(!mDetect_isbusy)
            {
                mDetect_isbusy = true;
                new Thread(new Runnable() {
                    public void run() {
                        mDetect_result = ncnnprocess_imgyuv(yuv, width, height);
                        mDetect_isbusy = false;
                    }
                }).start();
            }
            if(mDetect_result != null) {
                mSurfaceView.Draw(yuv, width, height, mDetect_result, 90);
            }
     mDetect_isbusy = false;
                }
            }).start();
        }
        if(mDetect_result != null) {
            mSurfaceView.Draw(yuv, width, height, mDetect_result, 90);
        }
至此 功能部分已经完整OK了
Code:https://github.com/chentyjpm/MobileNetSSD_Demo_AndoridNCNN